

Creating an elegant outdoor living space doesn’t have to break the bank. With basic carpentry skills and materials, you can build a beautiful DIY pergola that transforms your backyard into a stylish retreat. This comprehensive guide will walk you through every step of constructing your own pergola from planning to final touches.
In DIY Geodesic Dome Greenhouse: How to Build Your Own Biodome for Year-Round Gardening, Step 10 was Demolition of the Geo Dome. This is what I built in its place.
What Is a Pergola and Why Build One?
A pergola is an outdoor structure with columns supporting a roofing grid of beams and rafters. Unlike a gazebo, the roof remains open, allowing for partial shade while maintaining airflow and a connection to the sky above. Pergolas serve multiple purposes:
- Creating defined outdoor living spaces
- Providing filtered shade and weather protection
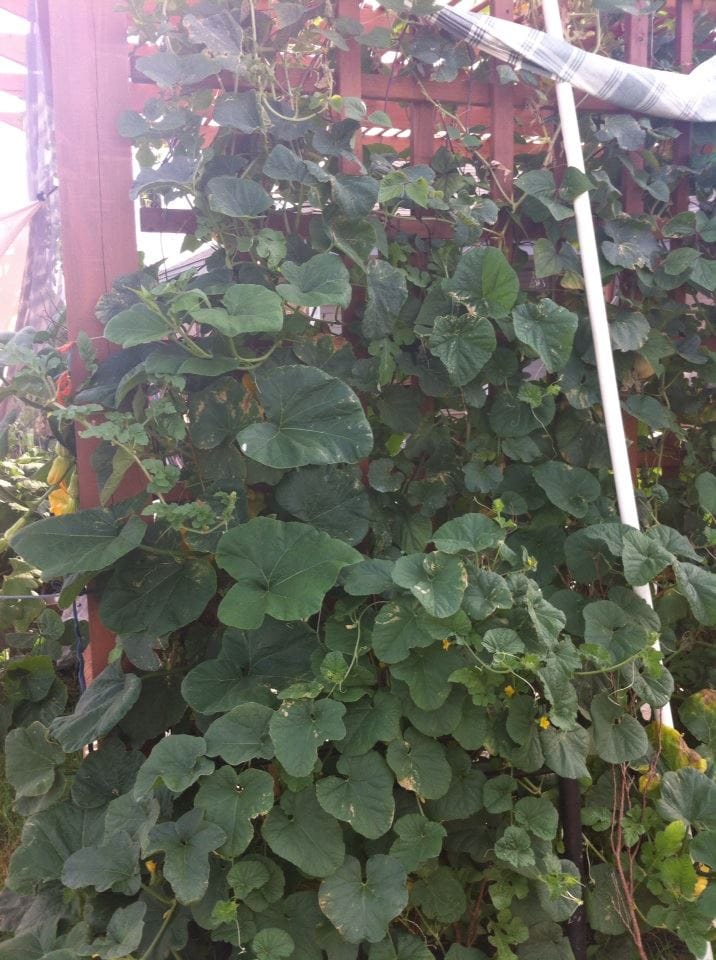
- Supporting climbing plants like wisteria or grapevines
- Increasing your home’s value and curb appeal
- Establishing a focal point for landscape design

Planning Your DIY Pergola Project
Choosing the Perfect Location
Before purchasing materials, determine the ideal placement for your DIY pergola. Consider factors like:
- Sun exposure and desired shade patterns
- Views you want to highlight or block
- Proximity to your home or other structures
- Underground utilities (always call before you dig!)
- Existing landscaping features

Determining the Right Size
The size of your diy pergola depends on its intended use. For a small seating area, an 8’×8′ structure might suffice. Consider dimensions of 12’×12′ or larger for dining tables or larger gatherings. Measure your space and mark the proposed footprint using stakes and string to visualize the finished structure.

Checking Local Building Codes
Many municipalities require permits for permanent outdoor structures. Contact your local building department to determine:
- Permit requirements and associated costs
- Setback restrictions from property lines
- Height limitations
- Structural specifications for wind/snow loads
Materials Needed for Your DIY Pergola
For a standard 10’×10′ pergola:
Lumber:
- 4 posts: 6″×6″×10′ pressure-treated posts
- 4 beams: 2″×8″×12′ pressure-treated lumber
- 10 rafters: 2″×6″×12′ pressure-treated lumber
- 20 purlins: 2″×4″×12′ pressure-treated lumber
Hardware:
- Concrete mix (approximately 8-10 bags)
- Post anchors (if using)
- Carriage bolts (½”×6″) with washers and nuts
- 3″ deck screws
- Joist hangers
- Exterior wood stain or paint
Tools Required:
| Preview | Product | Rating | Price | |
|---|---|---|---|---|

| LANBITOU Ladder, A Frame 4 Step Ladder Extension,... |
$159.99
$135.99 | Check Price | |

| XtremepowerUS 1500W Electric Post Hole Digger... |
$164.95 | Check Price | |

| VNIMTI Post Hole Digger Tool, Heavy Duty Post Hole... |
$56.99 | Check Price | |

| DEWALT Circular Saw, 7-1/4 inch, Pivoting with up... |
$201.52
$159.00 | Check Price | |

| DEWALT Double Bevel Sliding Miter Saw, 12-inch,... |
$669.00
$499.00 | Check Price | |

| CRAFTSMAN Level, 48", Box Beam (CMHT82347) |
$34.65
$28.99 | Check Price | |

| CRAFTSMAN 25-Ft Tape Measure with Fraction... |
$14.70
$13.99 | Check Price | |

| WORKPRO Aluminum Alloy Carpenter Square and... |
$22.99 | Check Price | |

| NoCry Clear Safety Glasses for Men and Women with... |
$13.99
$12.59 | Check Price | |

| PROHEAR 033 2.0 Upgraded Bluetooth 5.4 Hearing... |
$72.99 | Check Price |
Step-by-Step Construction Guide
Step 1: Mark and Prepare the Foundation
- Outline your DIY pergola dimensions using stakes and string, ensuring corners are square (use the 3-4-5 method to check)
- Mark the post locations at each corner
- Dig holes for each post (typically 12″ diameter and 24-36″ deep, depending on your local frost line)
- Add 4-6″ of gravel at the bottom of each hole for drainage
Pro tip: Use a string level between stakes to ensure your DIY pergola foundation is level, especially on sloped terrain.
Step 2: Set the Support Posts
Method 1: Direct Setting
- Place posts in holes and brace temporarily with 2×4 supports
- Check that posts are plumb (vertical) using a level
- Mix concrete according to the manufacturer’s instructions
- Pour concrete around posts, sloping slightly away from the post for water runoff
- Allow concrete to cure for 24-48 hours before removing braces
Method 2: Using Post Anchors
- Pour concrete bases and insert post anchors while wet
- Allow the concrete to cure completely
- Attach posts to anchors using the provided hardware
- Double-check that posts are plumb and secure
Height consideration: Account for finished height when setting posts. Standard pergolas are 8-10 feet tall, but adjust based on your preferences and proportions.
Step 3: Install the Main Support Beams
- Cut your 2×8 beams to length (adding 12″ of overhang beyond posts if desired)
- Temporarily brace beams in position across the tops of opposing posts
- Mark positions where beams meet posts
- Create notches in posts or use post caps/hardware to secure beams
- Attach beams to posts using carriage bolts or heavy-duty lag screws
- Ensure beams are level across their entire length
Design tip: Add decorative cuts to beam ends for a more finished appearance. Common styles include curved, angled, or notched profiles.

Step 4: Add the Rafters
- Measure and mark rafter positions along the beams (typically 16″ to 24″ apart)
- Cut rafters to size, including any decorative end cuts
- Install rafters perpendicular to the beams using joist hangers or by toe-nailing
- Check that rafters are evenly spaced and parallel
- Secure all connections with appropriate hardware
Structural note: Consider using larger dimensional lumber for rafters or adding additional support posts for longer spans.

Step 5: Install the Purlins (Cross Rafters)
- Measure and mark purlin positions across the top of your rafters (typically 12″ to 18″ apart)
- Cut purlins to length with decorative ends if desired
- Attach purlins perpendicular to rafters using deck screws
- Ensure purlins are evenly spaced and secure
Shade tip: Adjust purlin spacing based on desired shade levels. Closer spacing provides more shade, while wider spacing allows more sunlight through.
Step 6: Apply Finishing Touches
- Sand any rough edges or splinters.
- Apply exterior-grade wood stain or paint to protect from UV damage and moisture.
- Consider adding weather-resistant fabric, climbing plants, or lighting.
- Install optional features like privacy screens or retractable canopies.

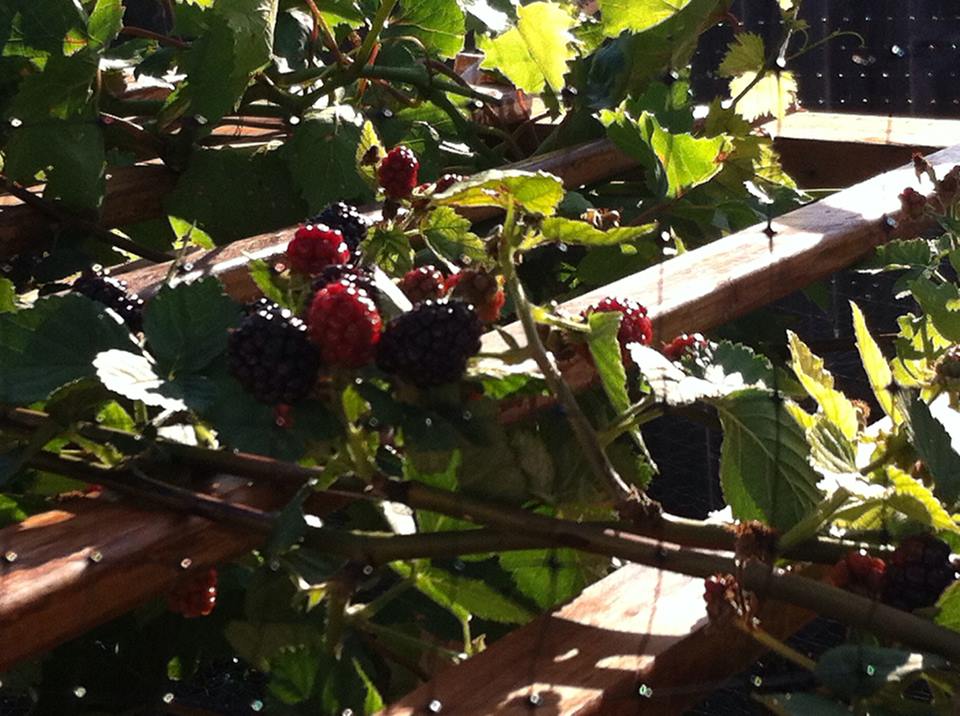
Step 7: Planting and Harvesting


Enhancing Your DIY Pergola
Lighting Options
- Solar post cap lights for subtle illumination
- String lights were woven through the structure
- Low-voltage landscape lighting for surrounding areas


Plant Integration
- Climbing vines like wisteria, jasmine, or grapes
- Hanging baskets suspended from purlins
- Container gardens positioned around the base


Weather Protection
- Retractable canopies for adjustable shade
- Weather-resistant curtains for privacy and wind protection
- Slat inserts between rafters for increased shade


Maintenance Tips for Longevity
To keep your DIY pergola looking great for years to come:
- Inspect annually for loose hardware or wood damage
- Clean thoroughly each spring to remove debris
- Re-stain or seal every 2-3 years (more frequently in harsh climates)
- Trim away excessive plant growth that could damage the structure
- Check for insect damage, particularly termites or carpenter bees
Common Pergola Variations
Attached Pergola
Connected directly to your home, eliminating the need for support posts on one side and creating a seamless transition from indoor to outdoor space.

- 【Premium Material & Excellent Load-bearing】The top of the...
- 【Stable and Solid】Carbon steel frames and triangle metal...
- 【Sloped Roof and Gap Drainage】Sloped roof design make the...
Arched Pergola
Features curved beams or rafters for a more elegant, architectural appearance.

- 10x10 Outdoor Pergola: The pergola is 10 in. L x 10 in. W, which...
- Sturdy Construction: This arched pergola is made of powder-coated...
- Durable Rip-Lock Fabric: The canopy is made of durable,...
Louvered Pergola
Incorporates adjustable slats that can be opened or closed to control sunlight and weather protection.

- ADJUSTABLE & FLEXIBLE: Our louvered pergola features 2 adjustable...
- ALUMINUM FRAME & LOUVERS: Constructed with a sturdy all-aluminum...
- AESTHETICS & PROTECTION: Outdoor pergolas seamlessly blend modern...
Troubleshooting Common Issues
Problem: Wobbling structure.
Solution: Add diagonal bracing between posts and beams for increased stability
Problem: Sagging rafters.
Solution: Install additional support posts or beams to reduce the span length
Problem: Water is pooling on top.
Solution: Ensure a slight slope to rafters and purlins for drainage
Estimated Costs and Timeline
Budget Considerations
- Basic 10’×10′ pressure-treated wood pergola: $500 – 1,000 in materials
- Cedar or redwood version: $1,200 – 2,500 in materials
- Premium hardwood or composite materials: $ 2,500 – 5,000+
Time Investment
- Planning and preparation: 1-2 days
- Post-installation: 1 day (plus concrete curing time)
- Frame construction: 1-2 days
- Finishing work: 1 day
With proper planning, most DIYers can complete a basic DIY pergola over a long or two consecutive weekends.
Common Mistakes to Avoid When Building a DIY Pergola
Even experienced DIYers can make errors compromising the structure’s integrity, appearance, and longevity when tackling a pergola project. Here are the most common mistakes to avoid during your DIY pergola build:
Planning and Design Mistakes
- Skipping permit requirements: Many homeowners proceed without checking local building codes, only to face fines or required modifications later. Always verify permit requirements before starting.
- Insufficient size planning: Building too small for your intended use, and creating a cramped space that feels uncomfortable. Measure your furniture and allow proper circulation space (typically 3 feet minimum around seating areas).
- Ignoring sun patterns: The primary purpose of a pergola is shade, yet many are positioned without considering the sun’s path. Track sun exposure in your yard throughout the day before finalizing placement.
- Building too low: A pergola that’s too short feels oppressive. For comfort, the minimum height should be 7½ feet to the bottom of beams, with 8-9 feet ideal for most installations.
Material and Structure Mistakes
- Using untreated lumber: Regular lumber will quickly deteriorate outdoors. Always use pressure-treated wood rated for ground contact, cedar, redwood, or composite materials designed for outdoor use.
- Undersizing structural components: Using too small lumber (4×4 posts instead of 6×6 for larger structures) can lead to sagging and potential failure. Scale lumber dimensions appropriately to your DIY pergola’s size.
- Choosing incorrect fasteners or using interior-grade or galvanized hardware: Will lead to rust streaking and premature failure. Always select stainless steel or hot-dipped galvanized fasteners rated explicitly for outdoor use.
- Failing to pre-drill holes: Driving screws or bolts without pilot holes often splits the wood, especially near edges. Always pre-drill, particularly in hardwoods or when working near the end of a board.
Foundation Mistakes
- Insufficient post depth: Posts that aren’t set deep enough will shift and lean over time. Generally, set posts at least 1/3 of their above-ground height into the soil (minimum 24″ in most regions).
- Poor drainage at post bases: Lack of proper drainage, water pools around posts, and accelerated rot. Always add several inches of gravel before setting posts in concrete.
- Unstable post installation: Wobbly posts lead to an unstable structure. Ensure posts are perfectly plumb (vertical) before concrete sets, using temporary bracing if necessary.
- Building on uneven ground without adjustment: Forcing a pergola onto sloped terrain without accounting for the grade leads to unstable structures and visual imbalance. Use stepped footings or adjust post heights accordingly.
Construction Process Mistakes
- Failing to check for square: Not maintaining square corners creates a visibly crooked structure. Use the 3-4-5 method to verify square corners: measure 3′ along one edge, 4′ along the perpendicular edge, and the diagonal between those points should be exactly 5′.
- Improper beam attachment: Simply toe-nailing or using inadequate hardware at beam connections creates weak points. Use proper structural connectors like post caps, through bolts, or notched connections.
- Neglecting lateral bracing: Pergolas can sway or twist without diagonal bracing, especially in windy conditions. Add corner bracing between posts and beams for structures over 8′ tall.
- Inconsistent spacing: Uneven spacing between rafters or purlins creates a visually jarring appearance. Measure carefully and use spacers or templates to maintain consistent gaps.
Finishing and Maintenance Mistakes
- Skipping proper sealing: Failing to apply sealant or allowing too much time between maintenance coats leads to UV damage, checking, and premature deterioration. Apply quality exterior sealant immediately after construction and maintain regularly.
- Applying finish to damp wood: Sealing wood with moisture content above 15-19% traps moisture inside, leading to mold and rot. Ensure wood is thoroughly dry before applying finishes.
- Overloading with plants too quickly: New climbing plants seem harmless, but can quickly become heavy and stress the structure. Plan for plant weight at maturity and provide appropriate support systems.
- Neglecting annual inspections: Small issues like loose hardware or minor cracks become major problems when ignored. Implement a yearly maintenance routine to tighten hardware, check for damage, and refresh sealants.
Budget and Timeline Mistakes
- Underestimating material costs: Many DIYers budget only for the obvious lumber needs but forget about concrete, hardware, and finishing materials. Add 15-20% to your initial material estimate to account for waste and unexpected needs.
- Rushing the process: Trying to complete the entire project in a single day leads to mistakes and frustration. Break the project into manageable phases: foundation, posts, beam structure, rafters, and finishing.
- Working alone on large assemblies: Attempting to lift and position heavy beams and rafters without help is dangerous and challenging. Recruit assistance for the heavy lifting phases of your project.
Avoiding these common mistakes’ll create a beautiful pergola that stands strong for many years. Remember that extra time spent planning and construction pays dividends in the long-term enjoyment of your outdoor living space.
Conclusion: Enjoying Your New Outdoor Living Space
Building your DIY pergola is a rewarding project that enhances your outdoor living experience while adding value to your property. The process requires careful planning and basic carpentry skills, but the results are worth the effort. Once completed, your DIY pergola will be a beautiful backdrop for countless memories—from quiet morning coffees to festive gatherings with friends and family.
Remember that your first pergola project doesn’t need to be perfect. Each step is a learning experience; minor imperfections often add character to handcrafted structures. Take your time, follow safety protocols, and don’t hesitate to ask for help with the heavy lifting or complex cuts.
Have you built a pergola, or are you planning to do one soon? What design features are you most excited about? Share your thoughts and questions in the comments below!
Note: Always check local building codes and homeowners association guidelines before constructing any permanent outdoor structure.
Last update on 2025-04-28 / Affiliate links / Images from Amazon Product Advertising API
This product presentation was made with AAWP plugin.


